🎯 Mastering AVD: How to Set Up Azure Virtual Desktop with FSLogix Episode 1

Azure Virtual Desktop (AVD) with FSLogix is a cloud-based virtual desktop solution that enables users to access a Windows environment from anywhere. FSLogix efficiently manages user profiles, ensuring fast login times and a consistent experience.
Why choose this solution?
This setup enhances performance, reduces login delays, and simplifies profile management—perfect for organizations with remote or hybrid workforces needing scalability, security, and centralized control.
YouTube Channel Configuration Links:
1- AVD + FSLogix – Episod 1
2- AVD + FSLogix – Episod 2
3- Test and verify
Prerequisites
1. Prepare Active Directory (AD) Environment
- Verify AD Setup:
- Ensure the Windows Server 2019 (AD01) in Azure is fully operational with the domain mstile.se configured.
- Confirm the AD server has a static IP address (used as the DNS server).
- Run ipconfig on AD01 to note the IP address for DNS configuration.
- Ensure the Windows Server 2019 (AD01) in Azure is fully operational with the domain mstile.se configured.
- Confirm the AD server has a static IP address (used as the DNS server).
- Run ipconfig on AD01 to note the IP address for DNS configuration.

Update DNS on the VNet
-
Update the DNS settings in AD01-vnet under DNS servers:
-
Navigate to the relevant resource group and select your Virtual Network (VNet).
-
Go to DNS servers.
-
Enter the IP address retrieved from the AD server.
-
⚠️ Purpose: Ensures AVD VMs can resolve the domain (mstile.se) for domain join

- In AD, create users (e.g., Peter, Kevin) and a security group (e.g., AVDUsers) for AVD users.
- Add the created users to the security group

2. Prepare Microsoft Entra ID
- Create a Global Administrator in Entra ID (if not already available)
- Set up a global admin account in Entra ID for synchronization and AVD management.
- If you already have a Global Admin account, you can use that one
- This account will be used to synchronize users and the security group to Entra ID
3. Synchronize AD with Entra ID
- Add Directory in Microsoft Entra Connect Sync:
- Install Entra Connect Sync on the AD server.
- Add the directory to sync AD objects (users, groups) to Azure AD for unified identity management.
- Provide credentials (e.g., global admin) and run the installation.


- Verify Synchronization:
- Confirm users (e.g., Peter, Kevin) and the security group (AVDUsers) are synced to Entra ID.


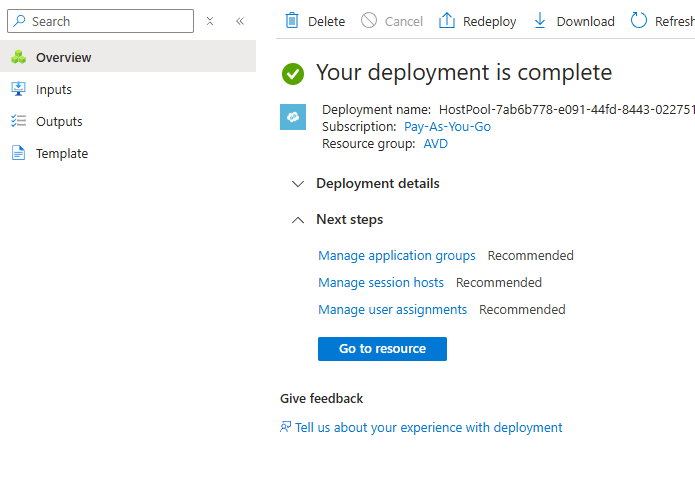
4. Create Host Pool
- Steps:
- Navigate to AVD och create a Host Pool
- Fill the cretical requirment like your RG and if you want desktop or remote app.

- Choose a host type (personal or Pooled)


- Select Load balancing algoritem (breadth/Depth first)

- Select Yes to create a session host VM.
- Specify a name prefix and choose an image (e.g., basic for lab purposes, no infrastructure/standard).

- Important: Ensure the VM location matches the AD location (e.g., SwedenCentral).
- Use a VM type with available quota (e.g., Standard_B2s with 2 vCPUs, 4 GiB RAM).
- Domain Join:
- Provide credentials for AD domain join:
- UPN of an AD user with permissions (e.g., vmjoiner@mstile.se).
- Set a local administrator password for the VM (can be changed after provisioning).
- Provide credentials for AD domain join:

Link Workspace
Select Yes to create a workspace linked to the host pool if you haven't already created one.

5. Validate Network and Quota
Check Network Security:
Ensure that Network Security Groups (NSGs) or firewalls allow the required traffic:
RDP (port 3389) – for remote desktop access
SMB (port 445) – for Azure Files access
HTTPS/HTTP (ports 443, 80) – for Azure Virtual Desktop (AVD) connectivity
Check VM Quota:
In the Azure portal, navigate to:
Subscriptions > Usage + quotas
Confirm that you have sufficient quota for the VM family you intend to use (e.g.,
standardBSFamilyfor Standard_B2s) in your selected region (e.g., Sweden Central).If there is no available quota (e.g., 0 for standardDASv5Family), you will receive an error message such as:
"QuotaExceeded: The regional quota for the specified VM size has been exceeded for subscription..."
To resolve this, either:
Request a quota increase via https://aka.ms/ProdportalCRP, or
Choose a different VM size or family with available quota in your region.

6. Validate Domain Join
- Steps:
- Navigate to the VM in the AVD pool and copy the private IP address.
- Use RDP from the AD server to connect to the VM using the IP address.
- Go to Settings > About on the VM to verify it has joined the domain (mstile.se).
- Troubleshooting:
- If domain join fails, check DNS settings, network connectivity, and credentials.


7. Assign the Application Group to Users
To allow users access to the Azure Virtual Desktop resources, you need to assign the application group to the appropriate security group.
Steps:
-
In the Azure portal, go to Azure Virtual Desktop.
-
Select Host pools from the left-hand menu.
-
Click on your host pool (e.g.,
AVDPool). -
Under Application groups, select the default application group (usually named after your host pool, e.g.,
AVDPool-DAG). -
Click on Assignments in the left menu.
-
Click + Add.
-
Search for and select the security group you created earlier for your AVD users (e.g.,
AVDUsers). -
Click Select to confirm the assignment.
✅ Users in this group will now have access to the remote desktop or applications published through this host pool.

Configure Azure File Service for FSLogix
8. Create OU for NoComputerPwExp
- Steps:
- In AD, create an OU named NoComputerPwExp.
- Edit a GPO: Computer Configuration > Windows Settings > Security Settings > Security Options > Domain member: Maximum machine account password age, set to 0.
- Link the GPO to the NoComputerPwExp OU.
- Purpose: Prevents password expiration for the storage account’s computer object during domain join.


9. Create Storage Account
- Create a basic storage account in Azure based on your needs (e.g., in SwedenCentral).

10. Create Fileshare (SMB)
- Navigate to the storage account and create a file share (e.g., avdprofile).


⚠️ Important Note:
There’s something to be aware of here, and I’ll demonstrate how it works.
If you copy the script and run it in PowerShell on the AD server, it will map an SMB drive and copy the script as expected. However, even though the drive is mapped, you won’t be able to configure which security groups have access to it directly from this method.
To reproduce the behavior:
-
Open PowerShell on the AD server.
-
Paste and run the script you copied.
-
The SMB drive will be mapped, and the script will execute.
-
However, access control (e.g., allowing specific security groups) cannot be set this way — you’ll need to configure permissions separately.


⚠️ Permission Configuration Issue for Profile Folder
If you create a folder named Profiles and attempt to add specific users or a security group to set permissions, you might encounter an error.
Error Description:
When trying to assign permissions in Server Manager, an error may appear indicating that the program cannot verify whether the machine is joined to the domain avdstorage.file.core.windows.net.
This typically happens when trying to manage access control on Azure Files–backed profile shares.
Solution:
-
Close the error message.
-
Reattempt the operation after verifying that the domain connection is properly established.
Why this matters:
Setting correct permissions ensures that:
-
Kevin can only access his personal folder (
\\Profiles\Kevin) -
Peter can only access his folder (
\\Profiles\Peter)
This per-user access control is critical for proper FSLogix profile management and data security.

11. Configure Azure Files for Domain Authentication
- Fix Domain Join Issue:
- If connecting to the file share fails due to domain issues (e.g., avdstorage.file.core.windows.net not recognized):
- Download the AzFilesHybrid script from https://github.com/azure-samples/azure-files-samples.
- https://learn.microsoft.com/en-us/azure/storage/files/storage-files-identity-ad-ds-enable?WT.mc_id=AZ-MVP-5004159

- Unzip and place it in C:\temp\azfileshybrid
 .
.- Run the script:
- Run lines 9-10.


- Change directory: cd C:\temp\azfileshybrid.

- Run line 13 (.\copytopspath.ps1) and import the module (line 13).

- Close PowerShell, reopen it as Administrator, rerun lines 9 and 10, then run
cd C:\temp\azfileshybridand repeat the copy command.

- Run Connect-AzAccount and select your tenant.
- Define variables (e.g., resource group, storage account name, OU) and run Join-AzStorageAccountForAuth.


- Verify: Check the NoComputerPwExp OU in AD to confirm a computer object for the storage account has been created.

12. Grant Permissions to SMB Fileshare
- Steps:
- Navigate to Storage Account > Fileshare > Access Control (IAM).
- Add roles for the synced security group (AVDUsers):
- Storage File Data SMB Share Contributor.
Storage File Data SMB Share Elevated Contributor.


- Configure Folder Permissions:

- Go back to the folder you created in the share (e.g., Profiles).
- Now it’s time to set the permissions, after configuring the share via PowerShell.
- Remove default Users and Authenticated Users groups from the folder permissions.

- When configuring permissions, locate the CREATOR OWNER entry.Instead of granting Full Control, modify the permissions by unchecking Full Control to apply more restrictive access based on your requirements.
- Add the AVDUsers security group with Modify permissions (remove Full Control).
- Ensure permissions apply to "This folder, subfolders, and files."

13. Install and Configure FSLogix

- Steps:
- Download FSLogix and unzip it to C:\temp.
- Copy fslogix.admx to C:\Windows\PolicyDefinitions and fslogix.adml to C:\Windows\PolicyDefinitions\en-US.

- Create a new GPO named fslogix:
- Navigate to Computer > Policies > Administrative Templates > FSLogix.
- Enable Profile Container.

- Set VHD location to the file share path (e.g., \\avdstorage.file.core.windows.net\avdprofile\profiles).


This is the path to your SMB share.
Important: At the end of the path, make sure to add the name of the folder you created.
Example:\\avdstorage.file.core.windows.net\avdprofile\<YourFolderName>
- Set size to 20000 MB.

- Enable Delete local profile when VHD should apply.

- Set container format to VHDX.

- Enable Flip Flop Profile (SID folder as %username%_%sid%).
- Create an OU named AzureAVD for session host VMs.

- Link the fslogix GPO to the AzureAVD OU.
- Move the AVD session host VMs to the AzureAVD OU.
- On the session host VM, run gpupdate /force to apply the GPO.
14. Connect to AVD and Verify
- Connect:
- Use a browser or Remote App: https://client.wvd.microsoft.com/arm/webclient/index.html.
Or download windows app - Log in with user credentials (e.g., Peter).
- Use a browser or Remote App: https://client.wvd.microsoft.com/arm/webclient/index.html.
- Verify Profile Mapping:
- Confirm each user gets a dedicated profile folder (e.g., Peter’s folder in \\avdstorage.file.core.windows.net\avdprofile\profiles).


15. Connect to AVD and Verify
Connect:
-
Use a browser or Remote App to connect: https://client.wvd.microsoft.com/arm/webclient/index.html. Or download windows app
-
Log in with the user credentials (Kevin).
Verify Profile Mapping:
-
Confirm that each user receives their own dedicated profile folder ( Kevin’s folder in
\\avdstorage.file.core.windows.net\avdprofile\profiles).


If Kevin logs in and tries to access Peter’s disk, he will not have access. This is because access permissions are typically set per user and folder. Ensure that the permissions are configured correctly so that each user (e.g., Kevin) can only access their own profile folder.


Kommentarer
Skicka en kommentar